So the next step is preparing the chassis which consists of drilling (or punching) the holes and mounting the various components (sockets, pots, fuse holder, pilot lamp, etc.).
The first step is to take our drilling template and transfer drilling points. This template looks pretty confusing, huh?
What I do is cut small holes in the center of each tube hole on the template then press through that with a Sharpie and transfer onto the enclosure.
 Then I use a punch to tap a small indentation into the enclosure. This ensures that my drill bit will not wander when I start the hole.
 So now I have transferred all points where I'll need to drill (for now...) - let's do some drilling!
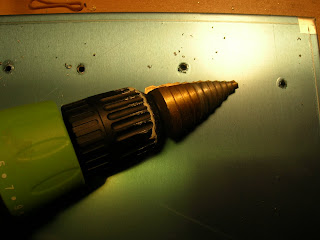
I use what are called stepped drill bits - these things are great. There is also a trade name, Unibit. You can get these in any Home Depot or the like.
 This is a smaller step bit - it goes from like 1/8" to 1/2"... no more changing bits (although they really only work for thin surfaces - you're not going to be able to drill holes through a 2x4 piece of lumber but it's perfect for drilling holes in an aluminum enclosure). I start with the smaller bit and drill pilot holes up to 1/2".
Then I switch to the big guns... I got this set from Harbor Freight (lots of cheap tools, not the greatest quality but good for some things). Here's a link Large Step Bits . They are pretty cheap compared to the Irwin you see above. That's okay because really, how many holes this big am I going to be drilling? It is a slow process and I will warn you that there will be very sharp burrs left around the edges of the holes. Another way do get holes like this is to use a punch such as this Punch . They are not cheap however!
Here's the result:
In the next part I'll finish preparing the chassis...


